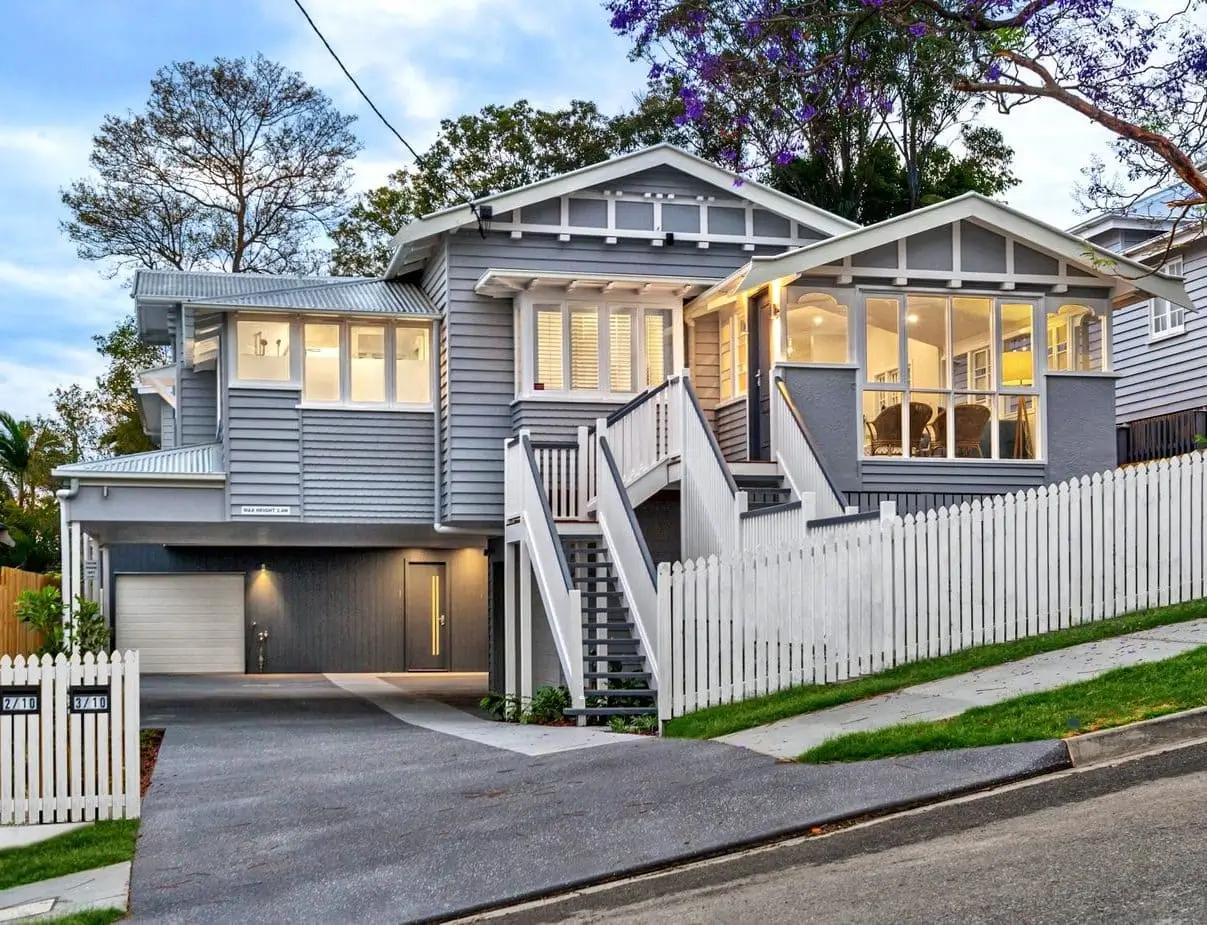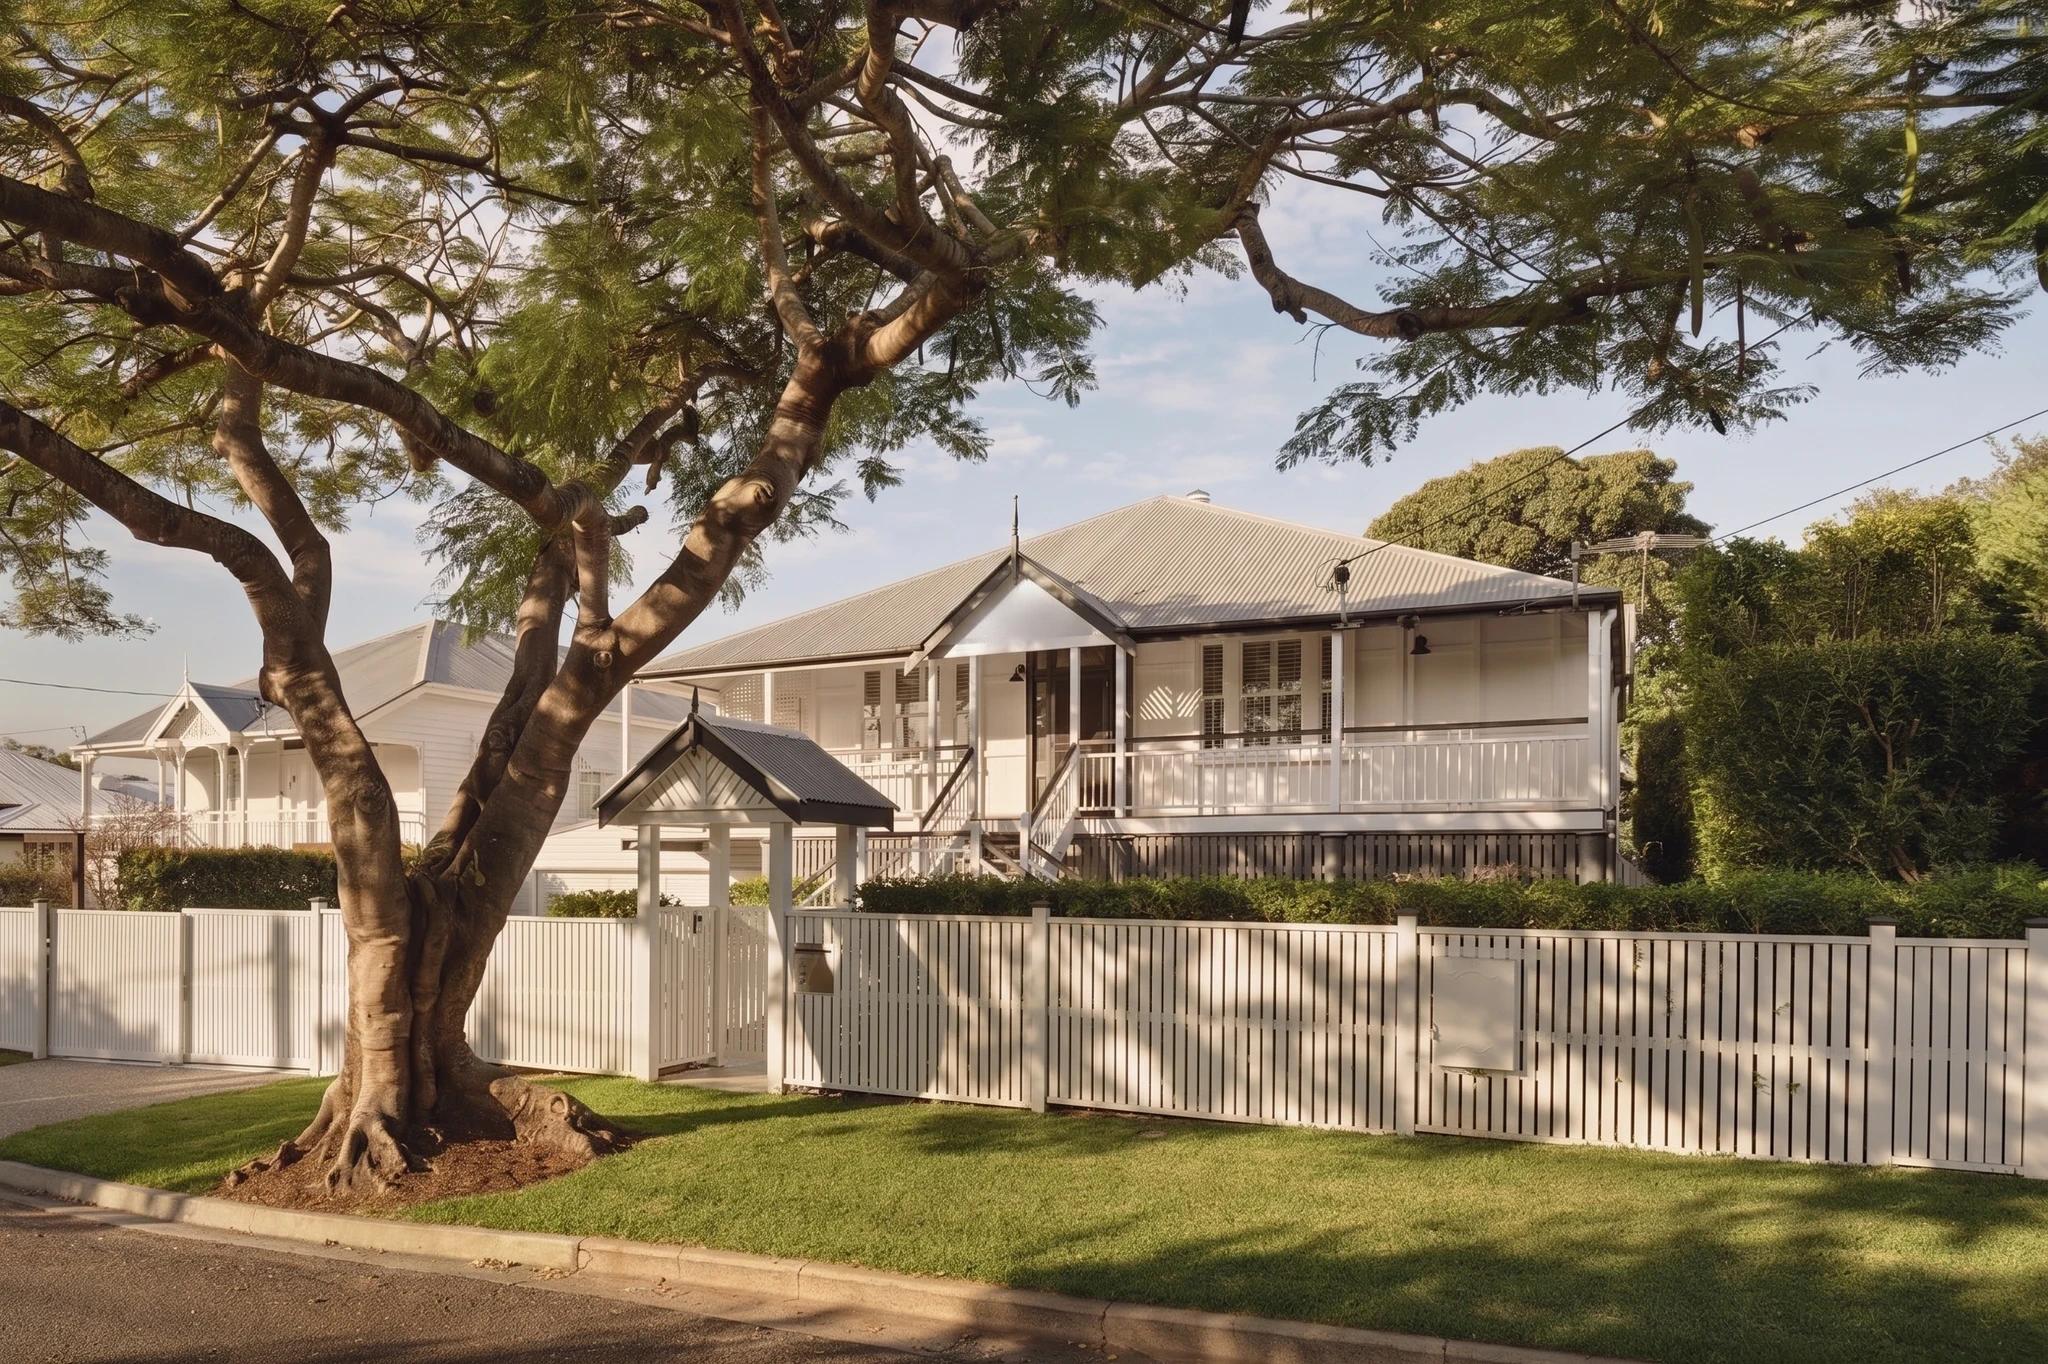
Understanding the knock down rebuild process is straightforward: you demolish an existing house to build a brand-new home on the exact same block of land. It’s an incredibly popular path for homeowners who love their street, their neighbours, and their local cafes, but have simply outgrown their current layout.
Opting for a knock down rebuild gives you a completely fresh start. You escape the structural headaches of an awkward, outdated floor plan without the massive financial and emotional drain of packing up and relocating.
Is the Knock Down Rebuild Process Right for You?
Deciding to flatten a house and start from scratch is a monumental call. It’s the primary alternative to enduring a messy renovation or moving suburbs entirely. For most families, the ultimate upside is simple: stability. You get to keep your school catchments, your daily routines, and your community connections, all while unlocking the exact home you’ve always wanted.
A custom rebuild also sidesteps the worst parts of a major renovation. Instead of uncovering hidden asbestos, ancient wiring, or decaying foundations midway through a wall removal, you start with a totally clean slate. This structural predictability makes your cash flow easier to manage and shields you from stressful mid-project surprises.
The Advantages of a Fresh Start
Unlike an extension, which is forever restricted by the original building footprint, a blank canvas gives you total architectural freedom.
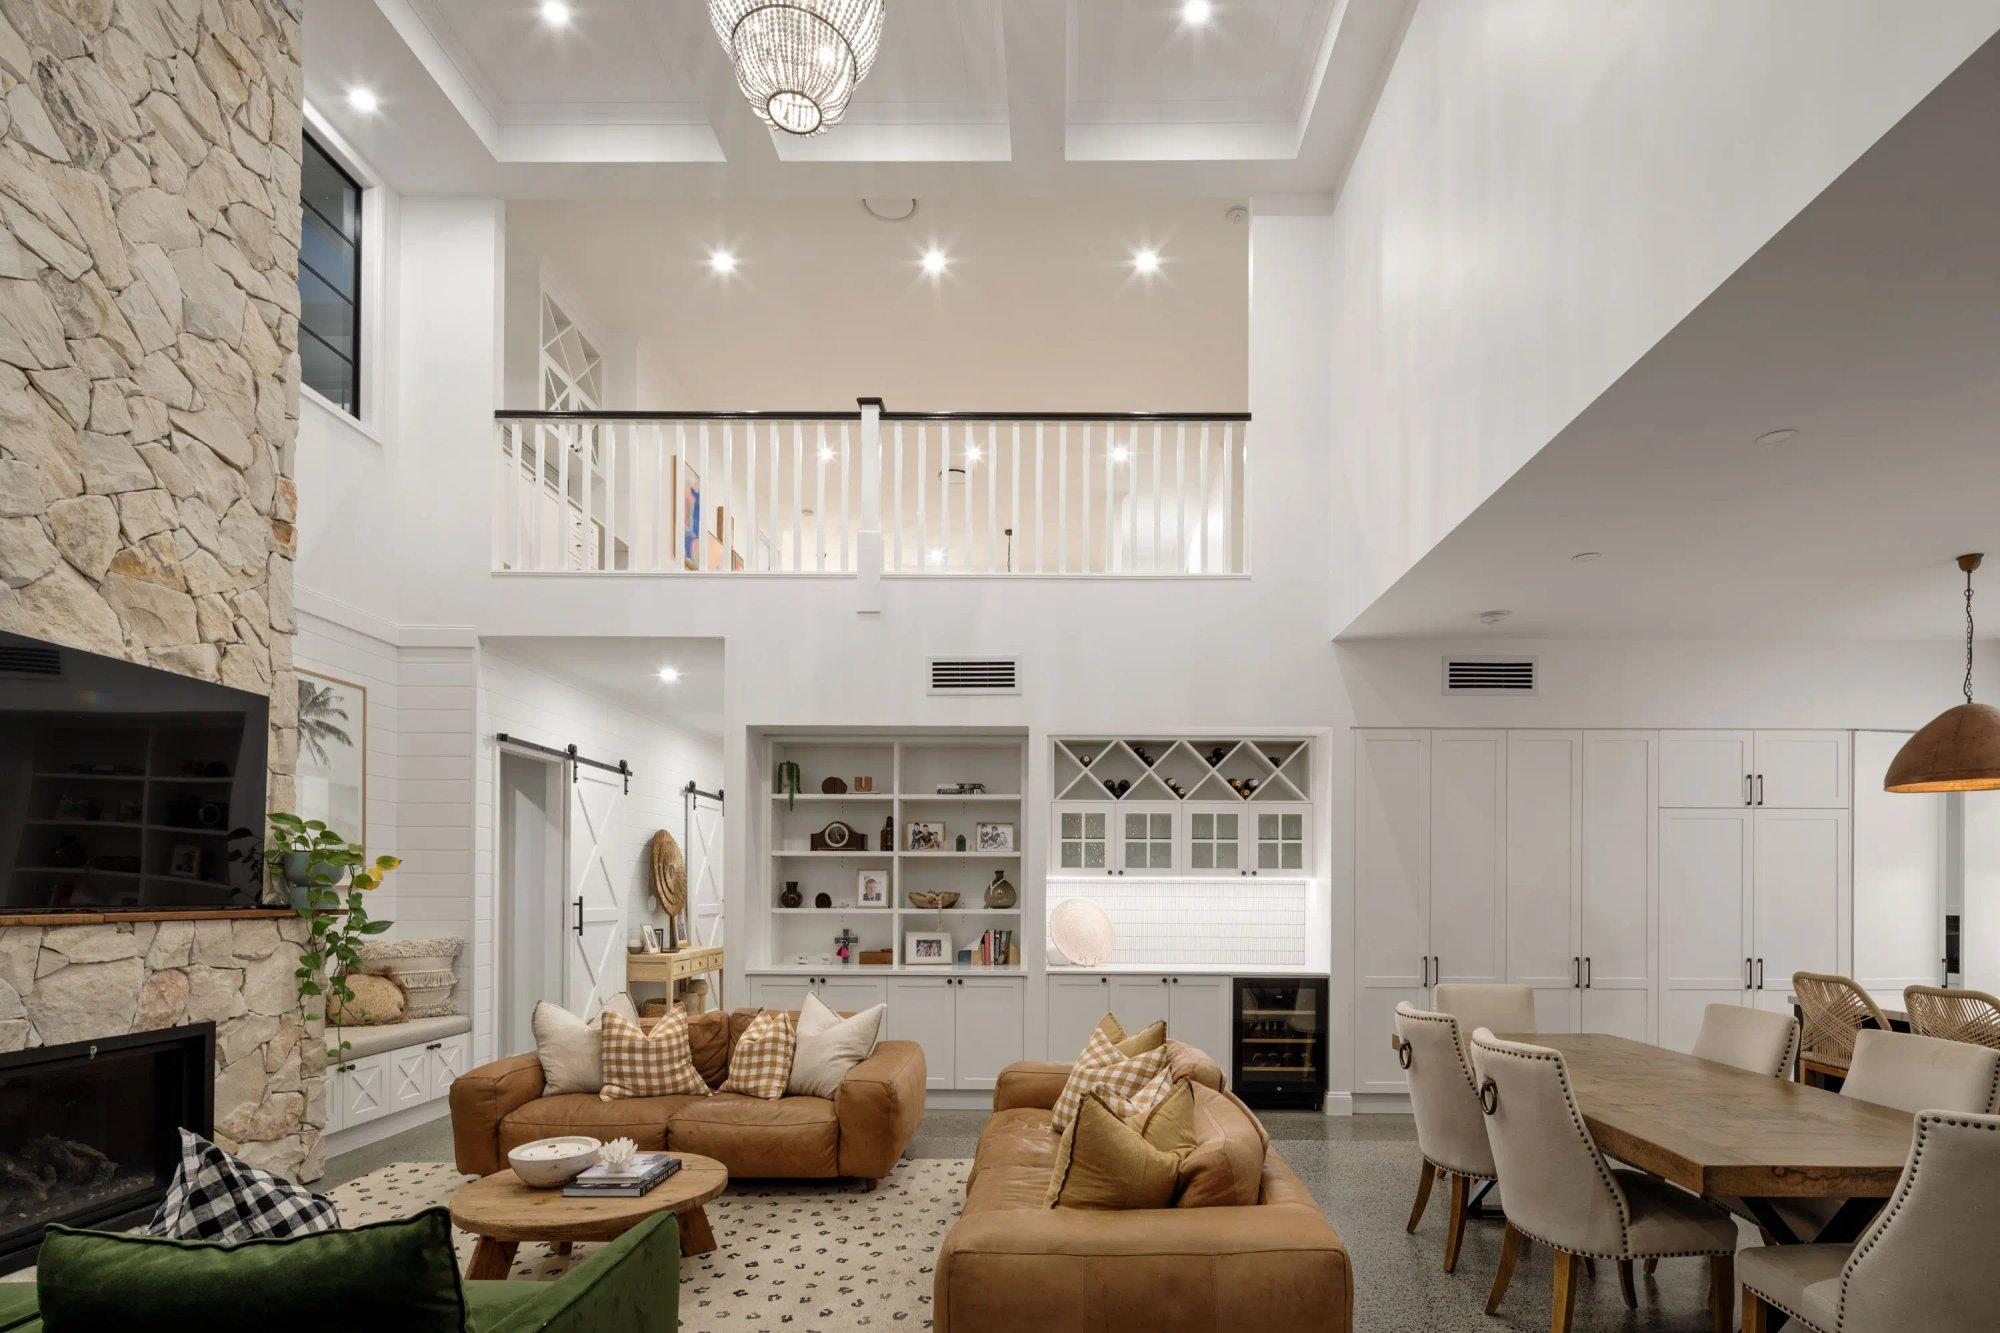
Tailored Layouts: You create a floor plan that responds directly to how your family moves. Whether that looks like an expansive open-plan entertaining pavilion, a quiet home office wing, or multi-generational living zones.
Modern Building Standards: New homes are built to current energy-efficiency regulations. This drastically lowers your cooling and heating bills from day one.
Future-Proof Infrastructure: You can easily integrate smart home automation, sustainable building materials, and accessibility elements into the foundations rather than retrofitting them poorly later.
Understanding the Reality
The benefits are clear, but you must enter this process with your eyes wide open. A knock down rebuild is a major logistical exercise involving demolition teams, council approval loops, and extended construction timelines.
You’ll need a concrete plan for temporary housing and storage during the transition. If you are trying to map out the logistics of shifting your life, it is worth exploring how self-storage can help with moving house to keep the interim period seamless.
The data shows just how common this path has become. Australian Bureau of Statistics data reveals that over 107,294 dwellings were approved for demolition across Australia in a single five-year window, with major capitals seeing the highest volume of activity.
To see how the two main paths stack up , let's look at them side-by-side.
The Knock Down Rebuild Process vs. Renovation
Consideration | Knock Down Rebuild | Major Renovation |
|---|---|---|
Design Freedom | Absolute control. A true blank canvas. | Constrained by the existing walls and rooflines. |
Cost Predictability | Higher initial outlay but far fewer surprises. | High risk of budget blowouts from hidden issues. |
Project Timeline | Predictable construction stages (9–18 months). | Highly variable due to structural unknowns. |
Structural Integrity | 100% brand new with full builder warranties. | Old structural issues can remain or cost a fortune to fix. |
Energy Efficiency | Built directly to modern high-performance codes. | Expensive and difficult to retrofit effectively. |
If your current house has great architectural character and you only want cosmetic updates, a renovation is likely your best bet.
However, if you are looking at changing the fundamental layout, moving plumbing, or fixing major structural decay, the costs quickly catch up to a new build. For a clear breakdown of how fees distribute across demolition and structural framing, read our Knock Down Rebuild Cost Calculator Guide.
Doing Your Project Due Diligence
The success of your project depends entirely on the prep work completed before any heavy machinery arrives. Think of this as your risk-mitigation phase. It’s where you uncover site challenges, clarify council overlays, and build a ironclad budget.
Your very first step is a professional site assessment. You need to look at your land through a strictly logistical lens. How will demolition trucks and heavy concrete pumps access the property? Narrow inner-city streets or steep blocks can add thousands to your site costs purely in handling fees.
What sits beneath the grass matters just as much. Getting a soil test is mandatory. A geotechnical report confirms whether you are building on stable sand or highly reactive clay, which requires heavy engineered concrete footings. This phase also flags any structural contaminants or buried utilities that need diverting.
Navigating Local Council Regulations
Before you commit to a specific design concept, you need to know the local planning rules inside out. These boundaries dictate what is physically permissible on your block, and checking them early prevents wasted design fees.
Start by examining your property’s zoning codes. This framework regulates building heights, site coverage ratios, and boundary setback requirements. You must also check for specific property overlays.
The most common site restrictions include:
Character and Heritage Overlays: Designed to protect traditional streetscapes, these can dictate your external materials, window styles, and roof pitches.
Bushfire or Flood Overlays: These triggers dictate specific bushfire attack levels (BAL ratings) or minimum floor heights to keep your build safe and insurable.
Vegetation Protection Orders: Rules that protect significant trees on or near your boundary, directly impacting your building footprint.
Creating an All-Inclusive Project Budget
A budget must account for the entire project lifecycle, not just the builder's final construction quote. A common pitfall is ignoring the soft costs and external finishes that sit outside the core building contract.
Always allocate a contingency buffer of at least 10-15%.. This isn't optional; it is an insurance policy against surprises and delays.
Your complete budget mapping should cover::
Pre-Construction Fees: Architects, engineers, land surveyors, soil testers, and council application lodgements.
Demolition & Clearing: Safely flattening the structure, removing hazardous materials, and levelling the pad.
The Building Contract: The core structural labour and material costs to build the lock-up shell and interiors.
External Works: Landscaping, driveways, boundary fencing, retaining walls, and pools.
To keep your sanity intact through these phases a whole house renovation checklist is an excellent way to track tasks. If you want to make sure your numbers are rock solid, read our guide on how to manage your budget in residential home design.
The Architecture & Approval Process
Once your site parameters are clear, you enter the design phase. This stage is all about balance: translating your lifestyle wishlist into buildable construction documentation while satisfying strict local planning codes.
To execute this smoothly, you need the right design partner. Let's break down the distinct professional options available for your team.
Assembling Your Design Team
Choosing the right professional to design your home is one of the most significant decisions you'll make. Each brings a different style, service level, and cost structure to the table.
Architect: Offers the highest level of bespoke design capability and technical oversight. An architect guides you from the initial concept sketch through to interior detailing and construction contract administration. They excel at maximising value on complex, high-end, or tricky sites.
Building Designer: A licensed professional providing custom design documentation. They offer a highly practical path for custom projects that require an individualised layout but don't need full architectural site management.
Draftsperson: Focuses purely on translating a pre-existing design concept into technical drawings for council submission. They are an option if you already know exactly what layout you want to build.
Expertise in navigating local council frameworks is mandatory for whomever you select. For a breakdown of how professional guidance shields you from delays, check out our article on navigating regulations and permits and the role of your architect.
The Two Paths to Planning Approval
In Australia, you generally secure planning approvals via one of two routes:
Development Application (DA): This is the traditional assessment run by your local council. It is mandatory for complex designs, character overlay sites, or projects requesting variations to standard codes. It includes a public notification period where neighbours can comment, and timelines typically span several months.
Complying Development Certificate (CDC). A fast-tracked, rules-based approval path. If your design adheres 100% to strict, predetermined state planning codes, a private certifier can approve the project in a fraction of the time, completely bypassing council queues.
From Initial Sketch to Construction Plans
Your architectural journey moves through four distinct, methodical phases:
Concept Design ➔ Design Development ➔ Council Submission ➔ Construction Documentation
Concept Design: The initial spatial puzzle. You map out basic floor plan flows, solar orientation, and how the home sits on the land.
Design Development: Refining the architectural shapes, selecting key external materials, and integrating early structural engineering input.
Planning Submission: Preparing the exact architectural packages required for your DA or CDC assessment.
Construction Documentation: The master plan. Every window specification, electrical layout, cabinetry detail, and junction is drawn and noted. This package allows builders to price your home with absolute accuracy.
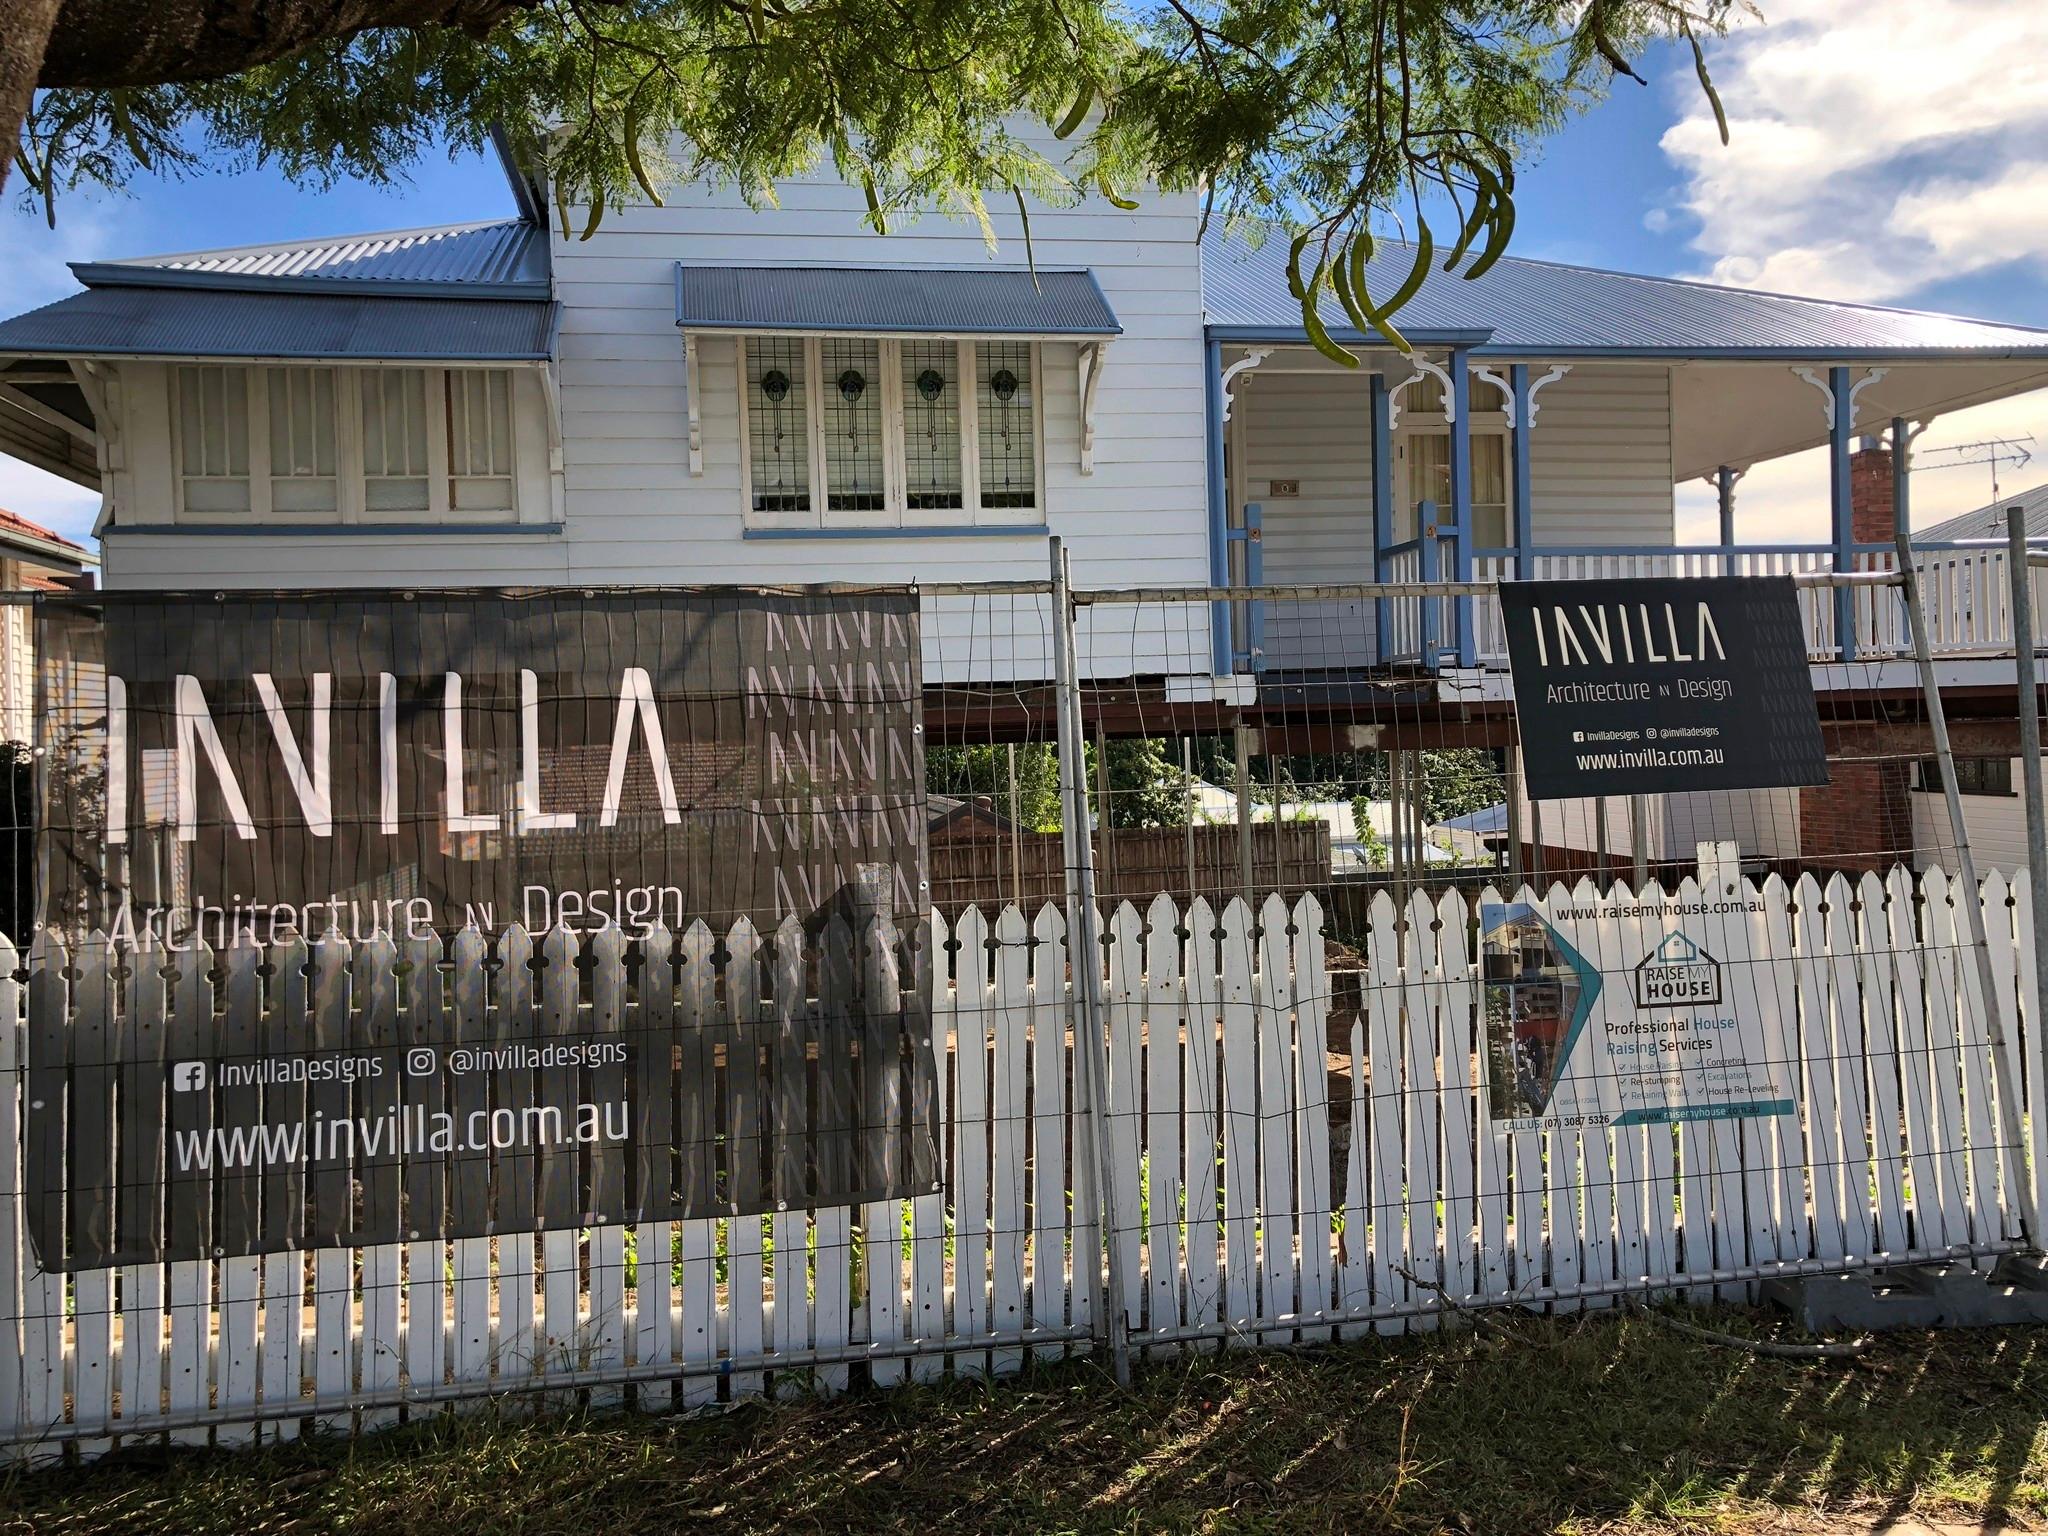
What to Expect During Construction
This is where your paperwork turns into a physical structure. Once contracts are executed, your land officially becomes a managed construction site. The process starts with systematic demolition. Crews will isolate utilities, safely remove any hazardous elements, and clear the block to create a clean, engineered building pad.
Key Construction Stages
Your builder will guide you through the schedule, but these are the five major milestones you will witness on-site:
The Slab: Inground plumbing lines are trenches, steel reinforcement is laid, and the concrete slab foundation is poured.
The Frame: The timber or steel wall studs and roof trusses are built. For the first time, you can physically walk through your future rooms.
Lock-Up: The building envelope is made completely weatherproof. Roof sheeting, external wall cladding, windows, and external doors are fully installed.
Fixing & Fit-Out: The interior takes shape. Insulation and plasterboard line the walls, followed by custom cabinetry, internal doors, architraves, and wet area waterproofing.
Practical Completion: The final detailing phase. Painting, flooring installations, light fittings, appliances, and landscaping are wrapped up.
Managing On-Site Communication
While your builder handles the daily trades, your role as the client remains vital. The smoothest builds rely on clear, professional communication channels.
Establish a regular, structured site meeting schedule with your project manager to review progress and answer design questions early. Always follow up phone decisions with a brief summary email so every variation or choice is documented in writing.
Remember that active construction sites carry strict safety and insurance regulations. Never enter the site unannounced, always coordinate walkthroughs through your builder to keep everyone safe. This collaborative approach yields exceptional architectural results, as highlighted in our Clare House case study, where a seamless client-architect-builder alignment was central to the home's finish.
Handover and the Post-Build Safety Net
Once construction wraps up, you will complete the Practical Completion Inspection (PCI). This is a comprehensive, room-by-room walkthrough with your builder to identify any minor cosmetic defects or outstanding items.
Test every window handle, inspect paint finishes under natural light, and check all plumbing fixtures. Your builder will document these items on a punch list and rectify them before final settlement.
At handover, you receive your keys, certificates of occupancy, and appliance warranties. Once you move in, your Defects Liability Period begins. This legal framework obligates the builder to return and repair any minor structural settling adjustments or cracks that appear as the building handles its first seasonal shifts.
Your Knock Down Rebuild Process Questions Answered
How long does a knock down rebuild project take?
Typically, the entire journey takes 12 to 24 months. The actual on-site construction phase usually takes 7 to 12 months, while the remaining time is split between architectural design, engineering engineering loops, and council approval queues.
What are the most common hidden costs?
The most frequent budget surprises occur outside the core building contract. These include hitting unexpected underground rock shelves during excavation, paying for upgraded electrical service connections from the street, and finishing costs like custom retaining walls, turf, and window coverings. Maintaining an independent contingency fund protects you from these realities.
Can I stay in my home while it is being rebuilt?
No. Once demolition begins, the property is legally classified as a commercial construction zone. For safety, liability, and insurance reasons, no residents can remain on site. You must factor the cost of renting local temporary housing into your structural budget calculations from the start.
Should I choose a custom builder or a volume builder?
It entirely depends on your site constraints, your lifestyle goals, and your budget. Volume builders work from a set of floor plans, which keeps initial costs predictable but limits your design flexibility. A custom builder delivers a completely bespoke home tailored specifically to your block's orientation, topography, and local breezes, giving you complete aesthetic and functional freedom.
At Invilla Architecture, we specialise in guiding clients seamlessly through every stage of the custom knock down rebuild process in Brisbane. If you want to explore the architectural possibilities of your current address, look through our residential project portfolio and reach out to our design team today.